Cinder + Git
If you're interested in keeping up with the latest Cinder development you'll want to setup a clone of Cinder's git repository. Cinder's home on GitHub is at https://github.com/cinder/Cinder.
In general Cinder's active development is done in the master branch. The release_* branch (for example, release_v0.9.0) is designed to reflect minor updates to the latest official release.
Installing Git on OS X
If you don't already have Git installed on your Mac, start by downloading the Git installer here.
Run the installer with the default settings and then launch Terminal. Navigate to the directory where you'd like to create the repository and run this command:
git clone --recursive git://github.com/cinder/Cinder.git cinder_master
If you aren't familiar with git, the only command you need to remember is git pull which, when executed from your new cinder_master directory, will update your copy of Cinder. Doing forget to rebuild Cinder (described below) whenever you do this.
Installing Git on Windows
If you don't already have Git installed on your PC, start by downloading the Git installer here.
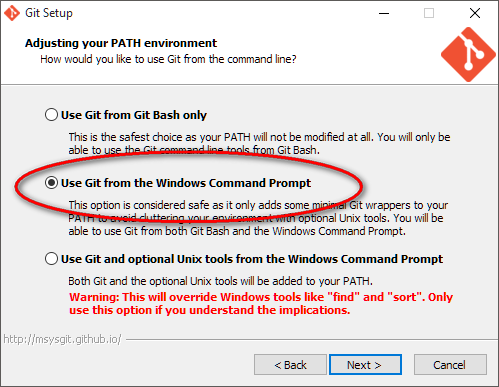
When prompted by the installer, we recommend that you select the Use Git from the Windows Command Prompt option for Adjusting your PATH environment. For line-ending configurations, we also recommend the default, Checkout windows-style, commit Unix-style. Once you've got Git installed, launch the Git Bash application. Navigate to the directory where you would like to setup Cinder, and execute the command:
git clone --recursive git://github.com/cinder/Cinder.git cinder_master
If you aren't familiar with git, the only command you need to remember is git pull which, when executed from your new cinder_master directory, will update your copy of Cinder. Doing forget to rebuild Cinder (described below) whenever you do this.
Building on OS X
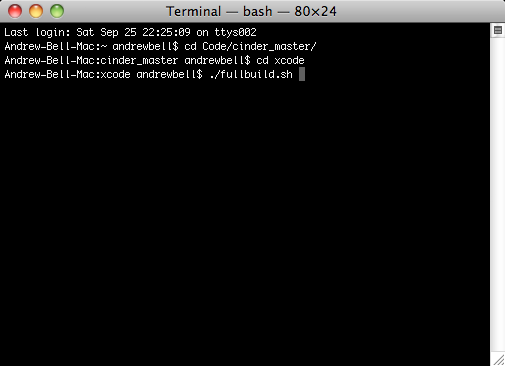
The most straightforward way to build both the Debug and Release configurations of the OS X, iOS and iOS Simulator targets is to run the script located at cinder/proj/xcode/fullbuild.sh
cd proj/xcode
./fullbuild.sh
Building on Windows
To build Cinder on Windows, first make sure you've got the rest of your development environment setup as described in the Windows Setup document. Next, open up the Visual Studio solution in cinder\vc2013\cinder.sln. You'll build as you would any Visual C++ project, and don't forget to build both Debug and Release.
After your build completes, the files cinder-v120.lib (for Release) and cinder-v120_d.lib (for Debug) will be created at the path cinder\lib.
OpenCV
Cinder's support for OpenCV is maintained separately from the primary distribution due to its size. To setup OpenCV support, cd to your blocks directory and execute the command below:
cd blocks
git clone git://github.com/cinder/Cinder-OpenCV.git
Generating Documentation
As a final step, if you'd like to have a local copy of the Cinder documentation, you can generate it using Doxygen. Follow this guide to learn more about generating documentaion.